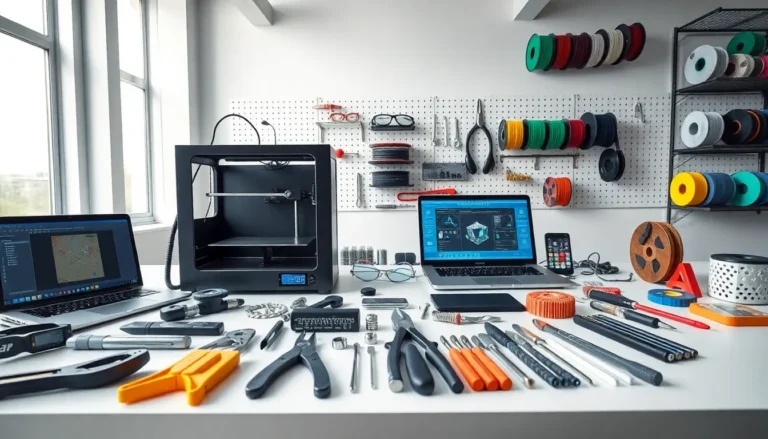
Effective 3D printing strategies separate successful prints from failed ones. Whether someone runs a small workshop or manages industrial production, the right approach saves time, reduces waste, and produces better parts. This guide covers practical methods to improve every stage of the 3D printing process. From material selection to machine maintenance, these strategies help users get consistent, high-quality results from their printers.
Table of Contents
ToggleKey Takeaways
- Effective 3D printing strategies start with choosing the right material—PLA for beginners, PETG for functional parts, and specialty filaments for specific applications.
- Optimize print settings like layer height (0.2mm for general use), speed (50-60mm/s), and infill percentage to balance quality, strength, and print time.
- Design models with printability in mind by orienting parts to align stress with layer lines and keeping overhangs under 45 degrees to reduce support needs.
- Maintain your printer weekly by checking bed leveling, cleaning nozzles monthly, and inspecting belt tension to prevent common print failures.
- Document successful settings for each material to build a reference library that ensures consistent results across future projects.
Choosing the Right Materials for Your Projects
Material selection forms the foundation of successful 3D printing strategies. Each filament type offers specific properties that suit different applications.
PLA (Polylactic Acid) remains the most popular choice for beginners and decorative prints. It prints at lower temperatures (190-220°C), produces minimal warping, and comes in countless colors. But, PLA lacks heat resistance and durability for functional parts.
ABS (Acrylonitrile Butadiene Styrene) handles higher temperatures and impacts better than PLA. It works well for mechanical parts, enclosures, and items exposed to heat. The tradeoff? ABS requires an enclosed printer and heated bed to prevent warping and cracking.
PETG bridges the gap between PLA and ABS. It offers good strength, flexibility, and heat resistance without the printing difficulties of ABS. Many users consider PETG their go-to material for functional prototypes.
For specialized applications, consider these options:
- TPU for flexible parts like phone cases, gaskets, and grips
- Nylon for high-strength mechanical components
- Carbon fiber composites for lightweight, stiff structures
- ASA for outdoor applications requiring UV resistance
Smart 3D printing strategies account for post-processing needs too. Some materials sand easily while others require chemical smoothing. Matching material properties to project requirements prevents wasted prints and frustration.
Optimizing Print Settings for Quality and Speed
Print settings directly affect output quality and production time. Fine-tuning these parameters represents one of the most impactful 3D printing strategies available.
Layer Height determines surface quality and print time. Smaller layers (0.1mm) create smoother surfaces but take longer. Larger layers (0.3mm) print faster with visible stepping. Most users find 0.2mm offers a solid balance for general-purpose printing.
Print Speed affects both quality and duration. Faster speeds reduce print time but can introduce ringing, stringing, and layer adhesion problems. Start with manufacturer recommendations, then adjust based on results. Speeds between 50-60mm/s work well for most desktop printers.
Temperature Settings require attention for each material. Too hot causes stringing and oozing. Too cold leads to poor layer adhesion and weak parts. Run temperature towers to find the optimal range for specific filament brands.
Infill Percentage impacts strength, weight, and material use. Decorative items need only 10-15% infill. Functional parts often require 25-50%. Solid infill rarely makes sense except for very small or highly stressed components.
Retraction Settings control stringing between travel moves. Increase retraction distance and speed to reduce strings, but excessive retraction causes jams in some hotends. Finding the right balance takes testing.
Document successful settings for each material. This creates a reference library that speeds up future projects and ensures consistent 3D printing strategies across different prints.
Designing Models With Printability in Mind
Good design practices prevent print failures before they happen. Experienced users apply these 3D printing strategies during the modeling phase.
Orientation matters. Parts printed vertically have weaker layer bonds along the Z-axis. Horizontal features print with full layer strength. Orient models so stress loads align with layer lines rather than across them.
Overhangs and supports require planning. Most printers handle 45-degree overhangs without support. Steeper angles need support structures that consume material and require post-processing. Design parts to minimize overhangs or split models into easier-to-print sections.
Wall thickness affects print success and part strength. Walls thinner than 1.2mm (three perimeters at 0.4mm nozzle) often fail or appear translucent. Design with minimum wall thicknesses of 1.5-2mm for reliable results.
Bridging allows horizontal spans between supports. Bridges under 50mm work well with proper cooling. Longer spans sag and require supports or design modifications.
Tolerance and fit need adjustment for printed parts. Holes print slightly undersized. Mating surfaces need 0.2-0.4mm clearance depending on printer accuracy. Test fit dimensions on sample prints before committing to full production runs.
These design-focused 3D printing strategies reduce failed prints significantly. A well-designed model prints successfully the first time, saving hours of reprinting and adjustment.
Maintenance and Troubleshooting Best Practices
Regular maintenance keeps printers running reliably. Neglected machines produce poor results and eventually fail. These 3D printing strategies for upkeep prevent most common problems.
Bed leveling affects every print. Check bed level weekly or after moving the printer. Many users prefer manual mesh leveling for precise calibration across the entire build surface. Auto-bed-leveling systems help but don’t replace proper initial setup.
Nozzle care prevents clogs and inconsistent extrusion. Clean nozzles with cold pulls (atomic pulls) monthly. Replace worn brass nozzles every few hundred hours. Hardened steel nozzles last longer when printing abrasive materials.
Belt tension affects dimensional accuracy. Loose belts cause ringing and position errors. Belts should feel firm with slight give, not guitar-string tight. Check belt tension monthly and adjust as needed.
Lubrication keeps linear rails and lead screws moving smoothly. Apply light machine oil to rails quarterly. Use dry PTFE lubricant on lead screws to prevent dust accumulation.
Common issues and quick fixes:
| Problem | Likely Cause | Solution |
|---|---|---|
| First layer not sticking | Bed too far from nozzle | Re-level bed, clean surface |
| Stringing | Temperature too high | Lower temp, increase retraction |
| Layer separation | Under-extrusion | Check for clogs, calibrate e-steps |
| Warping | Poor bed adhesion | Use adhesive, add brim, check enclosure |
Maintaining a troubleshooting log helps identify recurring issues. These 3D printing strategies for maintenance extend printer life and ensure consistent output quality.